CDE/Hy-Gain T2X, HAM 4 - Repair of the directional rheostat
CDE/Hy-Gain T2X, HAM 4 - Repair of the directional rheostat
CDE/Hy-Gain T2X, CD-45, HAM M, HAM III (3), HAM IV (4) and others - Repair of the directional potentiometer, by DL9BDM
First of all: These instructions are valid for all CDE, Telex, Hy-Gain or MFJ CD-45, T2X "Tailtwister", HAM III, IV and M types, as well as all older models with this potentiometer. I assume that the reader knows how to disassemble and reassemble the mentioned rotator models. There are countless instructions on the Internet, which I do not want to repeat here.
After many years of operation, interruptions of the direction indication of these rotators may occur. If there are no cable breaks or other failures, it is usually due to the contact tip, which rests on the resistance slide of the large wire potentiometer.

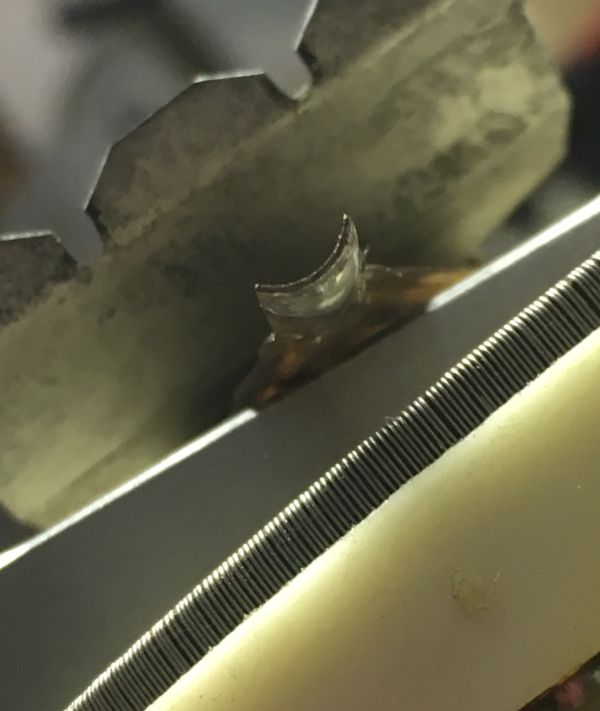
This is a common failure due to the copper or bronze sliding contact being too thin to withstand the abrasive characteristics of the resistance wire in the long term. Thus, as the years go by, a notch grinds into the sliding tapper, causing the unsafe contact and increased wear on the resistor wire.

Apart from dismantling the rotor first, the repair is a simple matter and can be done in half an hour. All that is needed is a small sheet of brass or copper about 0.3 to 0.4 mm (0.012 to 0.015 inch) thickness, the dimensions and shape are copied from the sliding contact.

The underside of the worn sliding contact is carefully lifted with a suitable tool and cleaned with a glass hair pencil. The cleaned underside of the contact is then carefully tinned. The same is done with the hollow side of the repair sheet. Then carefully place the repair sheet metal between the sliding contact and the resistor track and solder from the above side the whole thing together, very sparingly with solder.


Now the repair is finished, which saves the purchase of the quite expensive replacement potentiometer and ensures many years of trouble-free operation.
Before reassembly, the inside of the rotator should be cleaned thoroughly, the ball bearings replaced if necessary, and everything re-greased. The limit switches should also be checked.
To thank the Author because you find the post helpful or well done.