Repair of Speaker Surrounds
Repair of Speaker Surrounds

1. Is it possible to get a replacement (original speaker) for one or both of the bass drivers? If so, where?
2. If an original replacement is not available, what is a good substitute? What specifications (5 ohm resistance, what else)?
3. Would "refoaming" the bass drivers be a better option? NB: They are several options for this here in the US including private companies.
All suggestions will be appreciated.
To thank the Author because you find the post helpful or well done.

Those speakers are specifically designed for that unit, there is no replacement!
Go to a foam shop, and have some foam insulators cut for all the speakers.
To thank the Author because you find the post helpful or well done.
Refoam, Repair, or Replace
Regards,
LWS
Attachments:
- surround edge to edge ~ 10.5" (26.67cm) (152 KB)
- Cone edge to edge ~ 9 6/8" (24.765cm) (139 KB)
To thank the Author because you find the post helpful or well done.

Hi Laurence,
From your pictures it appears that the foam may simply be a gasket to seal the speaker against the baffle. Since the outer rim of the paper cone includes a folded wave structure, this speaker may actually have a paper surround, with the foam serving as a stationary gasket. If that is the case, you can substitute any suitable compressible material. Foam rubber, soft rubber, styrofoam, or even soft cardboard can be made to work.
On the other hand, if I have misinterpreted what I've seen in your pictures, and the foam really is the "surround" (external bellows) which connects the moving part of the cone to the stationary rim of the frame, then the fix is not quite so simple.
Is the foam merely a gasket on this speaker?
Tom
To thank the Author because you find the post helpful or well done.
The foam is actually just a gasket.
The speakers in question, have paper surrounds, and do not have to be replaced!
You could replace the unit with car speakers, but then you lose the value of your console.
As for the foam, go to a foam shop and cut you own gaskets. That's the easiest , cheapest, and best method!
I've replaced all the foam gaskets on my Grundigs.
To thank the Author because you find the post helpful or well done.
More Photos
After your post, I decided to take a look at the other driver. Although I didn't hear buzzing and distortion from it, it appears to be in the same shape as the problematic speaker. However, you can see a little more detail of the surround in these photos. Extrapolating a little, It appears that the surround did not permit much cone excursion. I wonder if, as you suggest, I could get away with substituting some other material with similar characteristics? Since my original post, I have discovered a couple of other possible sources for repair services, although, there is much to be said for doing it oneself.
Both speakers also have a small transformer mounted on them. It says "Grundig Drossel 9030-036". Does anyone have any idea of its purpose?
Attachments:
- The other bass driver (82 KB)
- Detail of small transformer (73 KB)
- Cloth Shroud as mounted. (136 KB)
- Cloth Shroud front. (117 KB)
To thank the Author because you find the post helpful or well done.
Hi Laurence,
The "Drossel" is a choke, which is part of the crossover network for the woofer/tweeter combination. The choke should be in series with the voice coil of the woofer, and prevents high frequencies from going to the woofer (so they go to the tweeter instead). If at some point you replace the speaker, you should transfer this choke to the new speaker and wire it the same way. It doesn't have to be physically mounted on the speaker; you can mount it on the baffle board if you want.
Since the foam is just serving as a gasket, it should only be over the rigid rim area of the speaker, and should not encroach into the flexible cone area at all. You can make a new gasket by cutting some thin foam into the right shape, or basically any other thin soft material that you can get your hands on. The purpose of the gasket is make a good air seal between the front and back of the speaker. Without a good air seal, the bass response is not as good, since the wave from the back of the speaker cancels the wave from the front of the speaker at low frequencies.
It's not clear to me that the disintegration of this foam gasket is really the cause of your distortion. If some of the foam fell into a position where it contacted the moving part of the cone, it could cause some distortion; however, this seems somewhat unlikely to me. After you replace the gasket with some suitable material, there may still be an issue with this speaker. Since this speaker lacks a felt dust cover over the center of the cone, if any debris has entered that area, there can be rubbing between the voice coil and magnet, which is a common cause of distortion in speakers. Other causes can be shifts in the position of the cone due to warpage of the frame, shifts in the magnet assembly, or warpage of the cone itself (although I don't see any evidence of that in your pictures).
Another thing to check is whether the outside of the cone is properly bonded to the rim of the basket (frame) at the outer edge. If this is loose, it will cause all kinds of problems. Is your cone well bonded at the outer edge?
To thank the Author because you find the post helpful or well done.
The cone mounting
Just call me Larry; everyone else does. There is no connection at all between the outer edge of the fiber cone and the metal basket on either speaker. As you can see, there are two distinct foam rings; the lighter on the outside and the darker one on the inside. The lighter colored foam is indeed mounted on the metal basket. The darker colored foam is on the outer edge of the fiber speaker cone itself. The line separating the two is in fact a complete separation between the basket and cone. Could this be the cause of the sound abberation? Another problem is, as you can see, there is no dust cap on the speakers. The cone seems to move easily but there could debris that has fallen into the center that is also causing the sound aberration. I have blown it out with compressed air but, without the cloth shrouds or a dust cap, it would be very easy for dust to get in there again. How easy would it be to install a dust cap myself?
Thanks for all your concern and help.
Larry
To thank the Author because you find the post helpful or well done.
Gaskets are not really a problem. I could use a felt gasket or a foam gasket very easily. Please see my reply to Tom. The big problem (I think) is that the speaker cone is not connected at all to the speaker basket. I don't see how that can be a good thing. Between you and Tom I'm about 65% convinced I can do it myself. However, I have found a company in Southern California that says they can remount the cones to the basket, install a dust cap, and make sure the speakers sound "good as new" for not much money. I was preparing to ship them until I came home and saw your posts.
To thank the Author because you find the post helpful or well done.
To thank the Author because you find the post helpful or well done.
Speaker repair
Hi Larry,
From what I can see in the pictures, it would appear that the outer rim of the paper cone should overlap a mating flat surface on the metal basket rim. If that is so, then the glue which originally held the two together has failed, and (as Omer proposes) it may be possible to fix yourself, if you follow a careful procedure.
The tricky part is to glue down the outer rim of the paper cone while keeping everything properly centered in the middle. If the cone gets glued into place a bit off center, you'll end up with distorted sound. What has worked for me for this kind of repair is to play music through the speaker while you're repairing it. You can hear firsthand how the positioning of the outer rim of the cone affects the sound while you're adjusting its position. When you think you've got it well centered, tack it down with three small drops of glue (Krazy Glue can be a nice choice, since it's quick) at equally spaced points around the rim. Then, if everything is fine, you can permanently glue the entire rim (and if not, break it free from the three drops and readjust the position.
An alternative method it to use a paper sleeve as a shim in the center hole of the cone to establish a constant gap between the voice coil form and the magnet pole in the center. With the paper shim in place, carefully glue down the outer rim (probably best to do the "three points" trial method first, as explained above). Then pull out the paper, and the cone should move freely, maintaining the air gap you established with the paper shim while gluing.
The centering of the voice coil on the central magnet pole doesn't rely entirely on the way you attach the outer edge of the cone. There is a bellows structure (sometime called a "spider" because of the way they were originally made) behind the center of the cone which is the main structure to keep the voice coil form properly centered on the magnet pole. However, forces on the cone from improper attachment at the edge of the cone can overcome the centering ability of the central bellows, so it's important to take care in attaching the outer edge.
If the cone doesn't have a nice mating surface on the metal basket to attach to, then perhaps you can get a clue from the other good speaker as to how it was originally attached.
If all of this sounds a bit too tricky, you can always send it to a professional speaker rebuilder. In the U.S., there are at least two well-known speaker repair outfits for antique radio speakers, and I have had good results with both: Jackson Speaker Service (517) 789-6400, and Hank Brazeal (205) 403-6243 or hankspkr@charter.net . I've used these outfits when speakers needed complete reconing, but I would think they could handle this kind of job as well. The place you found in California may also do a perfectly fine job.
To thank the Author because you find the post helpful or well done.
This is clear and concise and explains in detail a lot of concepts I'd stumbled across in my research. I think I'll give it a try.
Kindest regards!
To thank the Author because you find the post helpful or well done.
Larry,
Thomas is giving you in detail, sort of what has to be done.
When I replace the disintegrated foam, I strictly go around the metal edges, away from the moving surround part of the cone. I believe a 5mm by 5mm foam strip would work. it would be made out of the grey foam ( foam shops already know this is used for speakers). One strip would be placed on the paper side of the metal edge, and one strip on the metal side. Kind of what Grundig did in the picture you provided.
I like using contact cement for this procedure
You might also experiment with weather stripping.
Trust me Larry, this is not difficult to do!
To thank the Author because you find the post helpful or well done.
Gluing the speaker cone edge
I see one detail I left out, that you might want to watch out for: When gluing the outer edge of the cone down, it's important to avoid getting glue on the compliant "wavy" part of the edge. This "accordian" edge needs to be plenty flexible to allow sufficient cone travel, which is particularly important for a woofer.
Although I recommended Krazy Glue (cyanoacrylate) for tacking it down, if you find it soaks into the paper too much and travels inward to the accordian area, you'd better stop and use a different glue.
Good luck!
Tom
To thank the Author because you find the post helpful or well done.
Just to be perfectly clear
So that there is no confusion, the cone is completely separated from the basket around it's entire circumfrenece on both speakers. Further, that inner ring of darker foam actually rests on the outer edge of the cone. If, (and I assume it was), the cone was ever affixed to the basket, it was affixed by the inner red foam. Whoever repairs this speaker (me or a contractor), will have to remove what remains of the gasket and the mounting foam on the cone. Reattach some intermediate material, presumably foam, that will bridge the gap between the cone and basket and glue it properly to both.
Any suggestions as to 1) an appropriate solvent to remove the remaining foam; and 2) an adhesive to reconnect the mounting material to the basket and cone?
To thank the Author because you find the post helpful or well done.
Speaker Surround Reattachment
Hi Larry
I recommend using the (usually) readily available product called "Duco" cement to service many speakers.
This is a cellulose nitrate- based product quite similar to the GC brand of service cement that is often recommended for this sort of speaker repair. A good solvent for cleaning the old foam and adhesive is acetone, usually available in quarts.
A handful of cheap, disposable artist brushes of between 1/4 and 1/2 inch width will come in handy for application of solvent and the new adhesive.
(edit: Removed remaining advice that was essentially a duplicate of Tom's..Once is sufficient.)
"Frost King" weatherstripping (hardware/ home improvment stores)- will make a fine gasket replacement.
I hope this helps. Good luck with it.
Regards,
D. Daly
To thank the Author because you find the post helpful or well done.
Larry,
Ditto what Dennis wrote!
When it comes to German radios, he is one of the leading experts in North America, from the electronics, all the way to the piano lacquer finish on the cabinet.
There is always something you can learn from one his threads!
As I said before, try to do everything your self.
Omer
To thank the Author because you find the post helpful or well done.
All of you have been a great help.
Thanks for the specific step by step advice. That is precisely what I needed. There is another company in Ohio that may have an appropriate foam template to reattach the cone to the basket. They informed me that these particular speakers are very similar to certain Wharfedale speakers of that era (~'63-'64). I'll know Monday if that will work out.
Thanx to all of you; Tom, Dennis & Omer
To thank the Author because you find the post helpful or well done.
So far this discourse has been North Amercian!
Anybody with input from any other continents about this topic?!
Europe, South America, etc?
What do you guys do in other parts of the world in this situation?
Omer
To thank the Author because you find the post helpful or well done.
Cooks

There was quite professional help here - more would be less. Quality is what we seek for in this forum, not quantity - maybe quite unlike other forums. Please keep it that way. Thank you.
To thank the Author because you find the post helpful or well done.
rebuild!
Hello All,
I have rebuilt many of these speakers. The problem is that Grundig used foam rubber to suspend the outer edge of the cone, very similar to modern speaker manufacturers. Grundig apparently didn't know the short life properties of foam rubber, nor did they expect these speakers to be around 40 years later! My technique employs moderately flexible cloth (tee shirt material, color unimportant) which I glue to the basket and cone edge.(after shimming the voice coil, of course) I form a "trough" around the edge with my finger to provide flexibility, after the glue dries, I razor cut the center out and the excess around the edge. Then, using a slightly diluted latex rubber, impregnate the cloth as evenly as possible, then let it dry. Sometimes this may require cutting back the rolled paper edge to allow enough room for the cloth trough. I have 2 of these speakers waiting for rebuilding now, I will try to take some detailed photos when I do them. They don't look pretty when I'm done, but they sound great! Sorry for adding confusion, Ross
To thank the Author because you find the post helpful or well done.
Thank you for the confirmation and clarification regarding this speaker model.
So...We now know the foam material IS an integral part of the surround.
Now, _that_ IS indeed expert advice!
Regards,
D.Daly.
To thank the Author because you find the post helpful or well done.
Thanks very much!
Thank you very much for that lucid exposition. It also confirmed my belief that the foam was, in addition to being a gasket, the suspension for this speaker. I was told today that my "last hope" was not going to be able to help me.* Therefore, I was ecstatic to see your post and will await your pictures. I greatly prize my KS490 and want to get it right.
Kindest Regards,
LWS
*Sell me material that would work as suspension.
To thank the Author because you find the post helpful or well done.
rebuild!
Hi Larry,
Unfortunately, I can't sell you the material, ready to install, because the surround is actually formed in place on the speaker. If the manufacturers of the foam that is available could just make an 11 inch surround, these speakers could be repaired easily. But they make 10 inch and 12 inch and neither will work. I can rebuild yours for you if you want to send them to me.
In response to Dennis (Hi Dennis!) the surround is actually not the gasket as well, I install a separate gasket after the surround is in place, as well as a felt dust cap. Regards, Ross
To thank the Author because you find the post helpful or well done.
rebuild!
- 2008-01-30 (118 KB)
To thank the Author because you find the post helpful or well done.
No Sale - No Problem
I wasn't really asking you to sell me T-shirt material; I've got plenty of that ;-) What I did need and you provided was a photo! That's terrific and just what "the doctor ordered". A close up of the back of the speaker would also be nice, but I've got enough confidence to forge ahead notwithstanding. That was the last piece of the puzzle for me. I'm off to Home Depot to get the latex rubber & Duco cement (is that what you use as well?).
Thanx a bunch.
To thank the Author because you find the post helpful or well done.
Home-made or Other Alternatives
Since we have been enlightened to the fact the original surround was open-celled flex foam and not just a gasket, as was typical for many speakers of the vintage, I will qualify my reply recommending "Duco" as the adhesive for replacing a surround consisting of any foam material.
For typical metal-to-paper applications, Duco would be preferred, however, a PVA might be the best when working with polyester or urethane foam materials. Some speaker repair sites offer a specific adhesive to be used with their do-it-yourself surround kits.
I have done a brief search on the internet and have located 11 inch (for Acoustic Research units) "Edge-it" kits priced @ $26-29 USD per pair.
Regarding a complete home 'remedy' for this...
Since the original surrounds were made of open-cell foam, could there be a possibility of cutting new surround rings from the sheet media commonly sold as cut-to-size room airconditioner filters?
I can imagine using two metal cans or something similar as the guides for cutting the O.D. and I.D.
Aside from the filter media being a charcoal color, that material certainly seems to be quite similar in appearance to the original material. It certainly is flexible.
Simply a thought.
I understood the surround and gasket were two discrete parts.
Best of luck with it Larry!
Den-
To thank the Author because you find the post helpful or well done.
rebuild!
Hi Larry, Dennis and all,
I don't think you'll find the latex at home depot. I use a product called "mountains in minutes" from American science & surplus, I think Edmund scientific may sell it also. It is used for making molds for casting/reproducing small items. I dilute the latex with water maybe 10-15 % to make it flow better. For adhesive, contact cement works for gluing the T shirt fabric to the cone edge and basket. Be sure to center the voice coil before starting!! I use metal shims sold through clock material houses as suspension spring stock.
Thanks Dennis for the source info on the 11" surrounds. I am going to buy a pair and see how they fit. Ross
To thank the Author because you find the post helpful or well done.
Found the Latex
I found the latex at a local craft store, Hobby Lobby. I bought the "Mold Builder" because it sounded most like what you were using. All I have to do is decide whether I'll start tonight or fresh in the morning. Hopefully, I'll have them done and reinstalled by tomorrow night. I promise to report back however it turns out.
To thank the Author because you find the post helpful or well done.
Repair Success!
Thanx to all of you, I am pleased to report that I have successfully replaced the surround on both bass drivers and my angels are singing again. It required the sacrifice of my favorite black t-shirt but..... I just "eye balled" the cuts and it seemed to work out O.K. As Ross suggested, it is "ugly as sin" but sounds sweet. I used some generic finger nail polish remover (acetone) I found at Walmart to remove the old foam and adhesive. To make more room for the new surround, I trimmed the speaker cone to the inner bead. That was also an easy way to get rid of the foam that was on the outer edge of the speaker cone.
As previously reported, I found the latex at a local craft store, "Hobby Lobby". It was a much better priced and a more manageable volume. While installing the surround I shimmed the cone around the magnet with small strips of paper to keep the cone centered. You'll see the shims in some of the photos below. The tolerance was so tight that I could only get the shims in by cutting the paper into strips and placing them strategically around the cone.
There was not much room to get that nice "curve" in the surround as shown in Ross' photo. There was a little "droop" when I doped the cotton with latex but it tightened up when it dried. Still, I'm hoping it won;t be much of a problem. There's a nice "thump" to the bass when playing the speakers unmounted. Besides, the reason most 3rd party companies gave for refusing to replace the surrounds for me was that modern surrounds would allow too much cone excursion for these old speakers and burn them out. We'll have to wait for an "in cabinet" listen; hopefully this afternoon or evening. The only thing left to do is get some gasket material, make and install a felt dust cap, and reinstall and test the speakers.
By the way, I used "Krazy Glue" to attach the surround to the basket but a different adhesive to attach the surround to the cone. When the Krazy Glue touched the cone material, it released a caustic fume that really irritated my eyes.
Again, thanx to all.
Attachments:
- After foam removal. (120 KB)
- Close Up (101 KB)
- Tools (140 KB)
- Speaker and shims (124 KB)
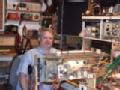
- The speakers are actually playing during this shot. (132 KB)
To thank the Author because you find the post helpful or well done.
Loudspeaker repair - refoum loudspeakers
Dear Laurence
Congratulations!
I think that this success story ought to be posted under the title I have given here (for searching engines (SE) I repeated loudspeaker in the plural ;-)
Would it be possible for you to make a good summary of thedifferent ways and then to bring what you have done with some integrated pictures (max. size 540 pixels wide, quality down to about 20 %)?
The text should have a certain length too so it is not really a summary but a report.
This should then be posted on the board "repair and Restoration - Tips and Tricks".
If you face problems I will help you (integrated pictures).
To thank the Author because you find the post helpful or well done.
Success!!
Hi Larry, Ernst, et al,
Congrats on the speaker surrounds, before you mount them, go to Home Depot and get some 5/16"X3/8" foam weatherstripping and apply it around the edge of your surround to seal the speaker edge to the baffle. If you glue some loose cloth to the basket around the magnet where the holes are, you can do away with the cloth bag. It's purpose was to keep dust and debris out of the gap area around the vioce coil. The dust cap will keep the inside of the voice coil clean. I am planning on taking some detailed pictures of this procedure when I do the next pair I have here.(I actually have several of these speakers) It won't be till next week at least. Keep us posted on your results! Ross
To thank the Author because you find the post helpful or well done.
Coda
Your thoughts must have penetrated the ether. I got some weatherstripping this afternoon. It was gray foam with one sticky side. I applied it with the sticky side toward the baffle. I was thinking about getting some felt to make a dust cap but decided I had something better. I just cut a dust cap out of an unused vacuum cleaner bag. How much more dust proof can you get? I mounted them about 3 hours ago and have been auditioning them ever since. Who knows what they sounded like 50 years ago; they sound terrific now. Now the bottom is nice and tight. It probably could have used a little more cone excursion. In some instances the bass notes decay pretty quickly. Maybe next time.
Attachments:
- Speaker with improvised dust cap. (69 KB)
- "In Box" audition (67 KB)
To thank the Author because you find the post helpful or well done.
Spongy film

Dear All,
My friend Antonio M.R. dos Santos, a friend of Rmorg here in Portugal, have sent me now his experience. I hope it doesn't come too late.


He has good reasons to believe , based on his experience, that this material can be a solution to repair almost of tears and holes in speakers, because it is flexible, light and smooth.

This material is a thin spongy film usually employed to wrap on IT components.
He has used PELIGON cement to repair this speaker.
This trigonometric plan was very useful to do it right.

Best Regards
Mario Coelho
To thank the Author because you find the post helpful or well done.